Posted by iDigitalise on | Comments Off on Why Modular & System Scaffolding is Replacing Traditional Scaffolding in Industrial Projects
Modular and system scaffolding is taking the place of traditional scaffolding because it is faster to put up, safer, more flexible, and less dependent on workers. These benefits make it perfect for current industrial operations where speed, efficiency, and following the rules are very important.
Introduction
Industrial construction projects are getting harder, need to be done quickly, and need to be safe. Scaffolding approaches that have been used for a long time are no longer good enough to address these changing needs.
Because of this, contractors are moving toward modular and system scaffolding, which works better, goes up faster, and has higher safety standards in industrial settings.
What is Modular & System Scaffolding?
Modular scaffolding is a type of pre-engineered framework that can be put together quickly and used on a variety of constructions.
Common Types
Scaffolding with ringlocks
Scaffolding with cuplocks
Systems of frames
Because they are strong and flexible, these systems are often employed in industrial scaffolding projects.
Why Traditional Scaffolding is Losing Relevance
People still utilize traditional scaffolding, although it doesn’t work as well on current constructions.
Key Limitations
Installation takes a lot of time
A lot of reliance on skilled workers
Less adaptable for complicated structures
More dangerous situations
These problems are making contractors look for better options.
Key Advantages of Modular Scaffolding
Faster Installation
Parts that are already made
Putting together and taking apart quickly
Fewer delays in projects
Improved Safety
Locking systems that are safe
More stable
Following safety rules
Reduced Labor Dependency
Needs fewer skilled workers
Teams can learn faster
Less money spent on labor
High Flexibility
Flexible enough to fit into complicated industrial settings
Good for numerous kinds of projects
Cost Efficiency
Lower cost over time
Can be used on more than one project
Less time spent not working
Industrial Applications Driving the Shift
In fields where safety and efficiency are very important, modular scaffolding is very common.
Key Sectors
Plants for oil and gas
Plants that make power
Refineries
Places where things are made
For these projects, scaffolding systems that are reliable and can grow are needed.
Market Shift: What the Data Indicates
The scaffolding business is slowly going toward modular systems.
Key Insights
System scaffolding is becoming more popular around the world.
More and more demand for industrial projects
Put safety and efficiency first
This change is in line with the market’s general growth of about 6–7% CAGR.
Challenges of Switching to Modular Systems
Modular scaffolding has numerous benefits, but it can be hard to get started with.
Key Challenges
More money needed up front
A learning curve for new systems
Need for good planning
These initial fees are worth it in the long run, though.
Why Contractors Prefer Modular Scaffolding Today
Contractors are selecting modular systems for good reasons:
Key Reasons
Projects finished faster
Better safety for workers
Over time, a better return on investment
Less complicated operations
Conclusion
Modular and system scaffolding is quickly taking the place of older methods because it is safer, more efficient, and more flexible. As industrial projects get bigger and more complicated, the need for scaffolding solutions that are faster and more reliable will only grow.
Contractors who start using modular systems early will have a demonstrable edge in getting projects done on time and on budget.
Posted by iDigitalise on | Comments Off on Growing Demand for Scaffolding in Infrastructure Projects
Scaffolding demand is increasing rapidly owing to urbanisation, construction initiatives by the government, and stringent worker safety regulations. Contemporary construction projects require scaffolding that can be erected quickly, is flexible in accommodating intricate designs, and is accredited with meeting global safety standards. This demand is growing across India, the Middle East, and the US, with no sign of slowing down.
Introduction
Scaffolding often gets treated as a background topic in construction, but it’s genuinely foundational to how projects get done. Without the right scaffolding for construction sites, work at height slows down or stops. Safety incidents happen. Project timelines stretch. The right setup keeps people safe, keeps the job moving, and keeps cost predictable. That’s why the question of which scaffolding system to use, and where to source industrial scaffolding solutions, has become a serious procurement consideration on major projects worldwide, especially with the growing adoption of modular scaffolding systems
What Is Scaffolding in Infrastructure Projects?
Scaffolding is a temporary structure erected around or within a construction site to provide a working platform for personnel, materials, and equipment at height.
The major types of scaffolding in infrastructure projects are:
Supported scaffolding: This is the most common type of scaffolding frame. The frame is placed on the ground and constructed upwards.
Suspended scaffolding: This scaffolding is hung from the overhead supports. This scaffolding is normally used when the supports cannot be placed on the ground.
Rolling scaffolding: This scaffolding is mounted on castors for rolling. This scaffolding is normally used in warehouses and industrial units.
Modular/system scaffolding: Pre-engineered components that fit together to defined specifications. Fast to assemble, structurally predictable, and increasingly standard on major infrastructure work.
Why Is the Demand for Scaffolding Increasing?
Rapid Urbanisation and Smart Cities Development
Rapid urbanisation across Asia and the Middle East, driven by initiatives like India’s Smart Cities Mission, is fuelling unprecedented demand for scaffolding across large scale infrastructure projects.
Rise in High-Rise and Complex Structures
Modern construction is pushing into taller, more complex designs that standard access solutions can’t support. System and suspended scaffolding are gaining ground because they handle irregular shapes, heavy loads, and evolving build phases more effectively than traditional setups..
Government Investments in Infrastructure
Public infrastructure spending is surging globally, driving demand for industrial scaffolding that meets strict safety standards and can be deployed quickly at scale.
Focus on Worker Safety and Compliance
Stricter global safety regulations for working at height are pushing contractors to adopt certified, higher-quality scaffolding systems despite cost pressures.
Faster Project Completion Timelines
Costly project delays are driving demand for faster, modular scaffolding and rental solutions that speed up setup while reducing site management effort.
In every sector, there are many different types of projects that will create major scaffolding needs from 2026 onwards:
Road and highway sectors: Scaffolding needs arise in building bridges, flyovers, and elevated highways.
Metro Rail Projects: Scaffolding used in viaduct construction, station construction, and construction of depots in countries such as India, the Middle East, and Southeast Asia is one of the largest sources of scaffolding requirements in the world.
Airports and railway stations: Expansion and development projects entail complex roofs and large internal volumes, necessitating flexible access solutions.
Petrochemical Plants/ Refineries: Maintenance, turnaround, and expansion activities in such industries always demand the use of scaffolding..
Commercial and residential mega projects: Mixed-use developments and residential projects in emerging markets create demand for multiple projects in the same area.
Types of Scaffolding Used in Large Infrastructure Projects
Tube and Clamp Scaffolding
Highly versatile system
Flexible for any shape
Needs skilled labour
Best for irregular access
System Scaffolding (Modular)
Pre-engineered modular components
Faster assembly time
Predictable structural performance
Lower long-term costs
Cantilever Scaffolding
No ground support
Extends from structure
Ideal for overhangs
Requires careful engineering
Suspended Scaffolding
Suspended from above
Ideal high-rise access
No ground support
Advanced safety features
Benefits of Using Advanced Scaffolding Systems
Improved Worker Safety
Built-in safety features
Fewer failure points
Reduced management complexity
Increased Productivity
Faster setup time
Lower labour costs
Reduced project overhead
Cost Efficiency
Reusable across projects
Lightweight aluminium systems
Rental over ownership
Cost efficiency long-term.
Flexibility for Complex Designs
Highly customizable systems
Deals with complicated geometry
Eases logistics assessment
Challenges in Scaffolding for Infrastructure Projects
High Initial Investment
High initial expenses encourage small companies to opt for less expensive systems, despite the fact that high-quality scaffolding is more economical in the long run.
Skilled Labour Requirement
Labor shortages ensure that scaffolding installation is one of the key considerations during planning, despite having modular scaffolding systems that reduce, yet do not eliminate, labor requirements.
Compliance With Safety Regulations
Maintaining scaffolding compliance requires ongoing inspections, documentation, and updates, creating significant operational challenges across multiple jurisdictions.
Weather and Environmental Factors
Scaffolding performs differently in:
high wind
extreme heat
coastal exposure
Scaffolding must be assessed for site-specific weather conditions, with protection added as needed to ensure safety and maintain productivity.
The global scaffolding market was valued at approximately USD 59.74 billion in 2024, according to Zion Market Research, and is projected to reach USD 85.61 billion by 2034 at a CAGR of 4.6%. Technavio places the growth rate higher at 7.1% CAGR through 2029, reflecting strong near-term demand from infrastructure pipelines in Asia and North America.
Asia-Pacific is the fastest-growing region, expanding at 7.0% CAGR according to Cognitive Market Research, driven by urbanisation in India, Southeast Asia, and continued Gulf construction activity. North America currently holds the largest regional share at roughly 40% of global revenue.
India’s infrastructure capex for 2025-26 alone is budgeted at USD $128.64 billion, representing 3.1% of GDP, per the Union Budget. CRISIL projects India will spend ₹143 trillion (~USD $1.7 trillion) on infrastructure between 2024 and 2030, more than double the amount invested in the preceding seven years.
How to Choose the Right Scaffolding for Infrastructure Projects
The proper selection of scaffolding depends on the following specific factors rather than the general recommendation:
Project type and height: The scaffolding needs for the exterior work on a ten-storey building are not the same as the needs for maintenance work at an industrial plant.
Load carrying capacity considerations: Determine the highest weight of the objects and individuals to be transported and then add a margin of safety to the weight.
Compliance with safety standards: The scaffold should be designed according to the regulatory specifications of the area where the project is located.
Installation ease: The proficiency of the labor force and the time required for the construction process should be considered while deciding among tube and clip and modular systems.
Initial cost vs. longevity: Consider the cost-benefit analysis and decide on a system that offers a higher rate of return over its lifetime.
Future Outlook of Scaffolding in Infrastructure Development
Increasing automation: There are active developments and early implementations of robotic assembly of scaffolding and automated inspection using drones in some of the larger construction sites.
Demand for smart cities: Infrastructure development in Asia and the Middle East will ensure a continued high demand for scaffolding services for the next decade or longer.
Sustainable construction practices: Environmental requirements will drive faster adoption of recycled materials, extended-life systems, and rental models that maximise asset utilisation across multiple project cycles.
Growth in emerging markets: Sub-Saharan Africa, South and Southeast Asia, and Latin America represent the next wave of large-scale construction activity as urbanisation rates in these regions accelerate through the 2030s.
Conclusion
The demand for scaffolding in infrastructure projects is growing for reasons that are structural rather than cyclical. Urbanisation, government spending, safety regulation, and the complexity of modern construction don’t reverse. They deepen. The infrastructure that scaffolding supports is always changing, therefore scaffolding has to keep up. This industry is accomplishing just that by using better materials, working faster, and keeping an eye on things.
Scaffolding won’t become a glamorous topic. But it’ll remain an essential one as long as the world keeps building.
FAQs
Why is scaffolding important in infrastructure projects?
Scaffolding ensures safe, efficient access at height, directly impacting project speed and safety standards.
What type of scaffolding is best for high-rise buildings?
Suspended scaffolding is best for high-rise facades, while modular systems suit internal or lower-level access.
How does scaffolding improve construction productivity?
Scaffolding boosts productivity by providing stable, accessible platforms and faster setup, saving significant labour time across projects.
What are the safety standards for scaffolding?
Scaffolding safety standards require rated load capacity, fall protection, regular inspections, and proper documentation.
What is the future of the scaffolding industry?
Modular, digitally monitored, and lightweight scaffolding will dominate, with rental and sustainable solutions driving market growth.
Posted by iDigitalise on | Comments Off on Global Construction Growth and Its Impact on the Future Scaffolding Industry
The construction industry is one of the most important sectors in the global economy. With this, there is a significant demand for infrastructure, housing, commercial buildings, and industrial buildings. With the construction industry still on the rise in terms of growth in developed as well as emerging economies, scaffolding is also on the rise.
Scaffolding systems play a vital role in construction projects because they provide temporary structures that allow workers to safely perform tasks at elevated heights. Whether it is a high-rise building, bridge rehabilitation, industrial maintenance, or residential development, scaffolding systems are essential for ensuring worker safety and improving project efficiency.
According to industry research, the global construction scaffolding market was valued at approximately USD 44.2 billion in 2023. Additionally, the market is expected to register a compound annual growth rate (CAGR) of approximately 5.3% from 2024 to 2030. This can be attributed to rapid urbanization, housing, and construction. (MarkNtel Advisors)
Global Construction Industry Growth
The global construction industry has shown immense growth over the past decade. This is due to the increasing population, urbanization, and development of the economy.
The factors that lead to the development of the construction industry include:
Urbanization in developing nations
Government investment in infrastructure development projects
Development of commercial real estate properties
Development of industrial facilities
With the development of cities and infrastructure projects, scaffolding systems are essential for the smooth execution of construction work.
Global Scaffolding Market Growth Forecast
Global Scaffolding Market Size Forecast
Year
Market Size
2023
$44.2 Billion
2025
$48 Billion
2027
$52 Billion
2030
$60+ Billion
The market for construction scaffolding is expected to grow steadily with the increasing demand for construction. The increasing infrastructure development and urban housing projects are some of the factors that are driving the market.
Diagram: Construction Industry Driving Scaffolding Demand
The construction industry relies heavily on scaffolding across several sectors:
Sector
Scaffolding Applications
Residential Construction
Housing projects, apartments
Commercial Construction
Office buildings, malls
Infrastructure
Bridges, highways, railways
Industrial Projects
Refineries, power plants
Energy Sector
Wind farms, power stations
As these industries grow, the demand for a safe scaffolding system will also increase.
Why Construction Growth Increases Scaffolding Demand
1. Expansion of Urban Housing Projects
Rapid population growth and urbanization have increased the demand for residential construction. The world is facing a housing shortage in urban areas, and as a result, massive residential construction is taking place.
Scaffolding systems will be required for:
Exterior wall construction
Plastering and finishing work
Installation of windows and façades
2. Infrastructure Development
The governments of the world are spending heavily on infrastructure development projects such as the construction of highways, airports, bridges, and rail networks.
Infrastructure development projects require scaffolding systems to enable workers to safely access elevated structures.
3. Growth of High-Rise Buildings
Contemporary urban centers are characterized by the use of skyscrapers and high-rise office buildings. These structures require scaffolding systems for façade installation, maintenance, and repairs.
4. Industrial Maintenance and Energy Projects
Industries such as oil refineries, chemical plants, and power stations sometimes require scaffolding for their maintenance purposes.
Scaffolding structures used in industries, such as power stations, enable workers to access complex machinery for the purpose of carrying out maintenance work.
Structure of a Typical Construction Scaffolding System
A conventional scaffolding structure employed for the purpose of construction work consists of a number of basic elements:
Base jack – serves as a foundation for stability and leveling
Vertical standards – represent the main support pipes of the structure
Horizontal ledgers – are used for the connection of vertical supports
Scaffold planks – serve as working platforms
Guard rails – protect workers from falling
Ladder access – enables workers to move between levels safely
These components combine to form a safe temporary structure used across construction sites.
Types of Scaffolding Systems Used in Construction
There are various kinds of scaffolding systems that are used in modern construction projects.
Supported Scaffolding
Supported scaffolding is the most widely used system. It is built from the ground up using vertical standards and horizontal ledgers.
Suspended Scaffolding
Suspended scaffolds hang from the roof of buildings using ropes or cables. They are commonly used for façade maintenance and window cleaning.
Modular Scaffolding
Ringlock and cuplock scaffolding systems are examples of modular scaffolding systems that offer faster erection and better structural integrity.
Technological Innovations in the Scaffolding Industry
The construction sector is now using new and better technologies in scaffolding, more and more.
Some of the new technologies that are being developed include:
Modular scaffolding systems
Lightweight aluminum scaffolds
Smart sensors for monitoring scaffolds
Digital safety check tools
In the construction industry, these technologies make things safer and more efficient.
Future Outlook of the Scaffolding Industry
The future outlook for the scaffolding industry is quite promising as the construction industry continues to grow.
The industry is expected to grow due to:
infrastructure development
expansion of urban housing
growing safety standards
industrial maintenance
The construction industry continues to spend more on construction worldwide, and scaffolding systems will remain a very important part of the construction process.
Key Takeaways
The construction industry is a major driver of scaffolding demand.
The global scaffolding market was valued at $44.2 billion in 2023.
The market is expected to grow at around 5.3% CAGR through 2030. (MarkNtel Advisors)
Infrastructure projects and urban housing development are the biggest growth drivers.
Technological innovations are transforming scaffolding systems.
Conclusion
The future of the scaffolding industry is being largely influenced by the growth in the global construction industry. With the increasing number of urban development projects, infrastructure development, and industrial construction projects, the demand for scaffolding systems is expected to increase steadily.
For construction companies and contractors, it will be important to keep up with the latest trends in the scaffolding industry.
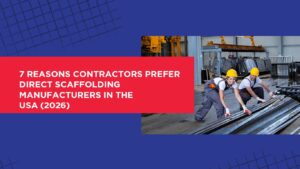
Posted by iDigitalise on | Comments Off on 7 Reasons Contractors Prefer Direct Scaffolding Manufacturers in the USA (2026)
More and more, contractors in the United States want to work directly with scaffolding manufacturers in the USA instead of wholesalers. This is because it costs less, gives them better quality control, faster delivery, engineering support, customization choices, and a more reliable supply chain. Contractors may achieve project timelines and make sure that safety requirements are in compliance with OSHA by working directly with construction scaffolding manufacturers.
Construction Procurement Trends in the USA (2026)
Infrastructure projects, commercial developments, and industrial growth are all driving the rapid growth of the U.S. construction industry. As projects get more complicated, contractors are working on smart ways to buy things.
In the past, people bought scaffolding equipment from distributors. But now, many contractors are working directly with scaffolding equipment makers and scaffolding system suppliers to better manage costs and make projects go more smoothly.
Construction businesses may cut down on supply chain delays, get technical help from suppliers, and find scaffolding solutions that match the needs of each project through direct procurement. This change is most obvious in fields like commercial construction, infrastructure development, and industrial maintenance.
Scaffolding Manufacturers vs Distributors: Key Differences
Contractors can make better buying selections if they know the difference between manufacturers and wholesalers.
Factor
Direct Scaffolding Manufacturers
Distributors
Pricing
Factory pricing without middleman markup
Higher prices due to reseller margins
Product Knowledge
Engineering and technical expertise
Limited technical guidance
Customization
Custom scaffolding systems available
Mostly standard inventory
Delivery Speed
Direct production and shipping
Dependent on distributor inventory
Compliance Support
Full documentation and certifications
Limited compliance support
When you work directly with construction scaffolding makers, you can better control quality, delivery times, and safety rules.
7 Reasons Contractors Prefer Direct Scaffolding Manufacturers
1. Lower Equipment Costs
One of the best things about ordering directly from scaffolding manufacturers in the USA is that it saves you money.
Distributors usually add a lot of extra costs before sending supplies to contractors. Contractors get factory-level prices when they buy directly from scaffolding equipment manufacturers. This cuts out the middleman and saves money.
This is especially helpful for big building projects that need thousands of scaffolding parts. Lowering the cost of buying things helps contractors keep their project bids competitive while still safeguarding their profit margins.
2. Better Quality Control
Direct manufacturers are in charge of the whole process of making anything, from getting the raw ingredients to testing the finished product.
Scaffolding manufacturers that you can trust follow strict quality control rules and make sure that their scaffolding systems exceed safety and structural standards. This involves checking for corrosion-resistant materials, load testing, and checking for durability.
When contractors work directly with manufacturers, they can be sure that the scaffolding systems they utilize on their projects are made to meet industry standards and engineering specifications.
3. Faster Delivery and Reliable Supply Chains
The deadlines set in construction projects are extremely tight. There have been cases where the delivery of the scaffolding materials alone has brought the entire construction process to a halt, including the construction of the façade, the structure, and the maintenance.
The contractors can effectively control the production schedule of the scaffolding materials if they have direct communication with the supplier of the scaffolding system.
The manufacturers can give the contractors the right delivery date, especially for large construction projects.
4. Access to Engineering Expertise
One of the best things about working with scaffolding manufacturers in the USA is that they can help you with engineering problems.
Manufacturers typically use expert engineers to help contractors with things like
planning scaffold designs
load capacity calculations
structural safety recommendations
installation guidelines
This technical help makes sure that scaffolding systems are put up appropriately and safely in complicated construction settings.
5. Custom Scaffolding Solutions for Complex Projects
Standard scaffolding systems can’t always meet the needs of modern construction projects.
Contractors often evaluate different scaffolding systems for construction projects before selecting customized solutions for bridges, stadiums, or high-rise buildings.
Some examples are:
scaffolding for erecting bridges,
stadiums, and arenas scaffolding
scaffolding for maintaining industrial plants
façade systems for high-rise buildings.
The customization makes the project a lot safer and efficient, as it ensures the scaffolding structure meets the needs of the project.
6. Stronger Compliance with Safety Regulations
Every construction project in the United States has to meet the safety regulations. In order to ensure the safety of the workers, the scaffolding systems have to meet the strict OSHA regulations.
The reputable scaffolding manufacturers in the United States provide a lot of paperwork, which proves that they are following the safety regulations. It includes test reports, product certificates, and instruction guides on how to assemble the product.
A lot of contractors would rather deal with just one manufacturer of scaffold equipment, rather than working with lots of different ones.
Collaborating directly ensures that the quality of the products is good, the prices charged are fair, and the support received is fast in case of technical hitches.
The manufacturers also offer training, upgrade, and advice on new technology in the construction of scaffolding, which helps the contractor build things faster over time.
What Contractors Should Look for in Scaffolding Manufacturers USA
Contractors should think about a number of things before choosing a manufacturer.
Some of the vital things to consider include:
Experience in manufacturing and reputation within the industry
Adhering to OSHA safety standards
Ability to provide unique scaffolding systems
Engineering support and advice
Reliable lead times
The right scaffolding providers in the USA will make a significant difference in the success of the project.
The Future of Scaffolding Supply Chains in 2026
Contractors and manufacturers are working together more directly in the building business. Digital procurement, logistics, and scaffolding technology are making the direct relationship more useful and effective for the building business.
As more money is spent building the country, the need for construction scaffolding manufacturers will continue to grow. Contractors who develop strong relationships with the manufacturers will enjoy better prices, stability, and efficiency in their projects.
Conclusion
More and more contractors in the US are choosing to work directly with scaffolding manufacturers in the USA instead of going through wholesalers. Direct relationships have reduced prices, greater product quality, faster delivery, and superior technical support.
Contractors may make projects run more smoothly while still keeping safety standards high by working with skilled scaffolding equipment manufacturers and scaffolding system providers. As construction projects get bigger and more complicated, the U.S. construction industry will need to rely on direct ties with manufacturers even more.
Posted by iDigitalise on | Comments Off on Aluminum Planks for Sale: Weight Capacity, Sizes & Load Guide
When searching for aluminum planks for sale, weight capacity is a factor that should not be overlooked. As a contractor, builder, or industrial materials seller, choosing the right scaffold plank is critical for safety, code compliance, and longevity.
Aluminum scaffold planks are designed to be lightweight, corrosion-resistant, and support heavy loads. But weight capacity depends on span length, width, design, and reinforcement..
If you’re purchasing high-quality aluminum scaffold planks for commercial or industrial use, this guide will help you make the right decision.
What Is the Weight Capacity of Aluminum Scaffold Planks?
Typically, most aluminum scaffold planks are rated according to duty levels:
Light Duty – 25 lbs per square foot (psf)
Medium Duty – 50 psf
Heavy Duty – 75 psf or higher
In a heavy construction setting, contractors usually require heavy-duty aluminum planks for sale, which support loads and are more durable.
When considering available aluminum planks for sale, it is essential to examine the load chart provided by the manufacturer before installation.
You can view the load-rated designs that are available on our Aluminum Scaffold Planks product page.
How Span Length Affects Load Capacity
The span length, or distance between supports, directly correlates to the weight capacity of the aluminum plank.
For example:
7 ft aluminum plank → Greater weight capacity
10 ft aluminum plank → Moderate weight capacity
16 ft aluminum plank → Requires more stringent engineering support
For longer planks, integrity must be enhanced to counter deflection.
For a frame scaffold system, planks must be placed with support span lengths in accordance with the manufacturer’s specifications.
Standard Aluminum Scaffold Plank Sizes
Some common sizes are:
7 feet
8 feet
10 feet
12 feet
16 feet
The widths range from 12 to 20 inches, depending on how they will be used.
Choosing the right plank size ensures even weight distribution for your scaffold platform. For maximum edge safety, these planks should be combined with properly installedscaffold guard rails for improved worker safety.
Why Aluminum Planks Are Better Than Wood
When compared to standard hardwood scaffold boards, aluminium planks have the following advantages:
Better durability
No warping or rotting
Surface that won’t slip
Same weight limit
Lasts longer
Less money spent on upkeep
Water damage and cracking can eventually ruin wooden planks, while aluminium planks can handle severe commercial loads without losing their structural integrity.
Industrial customers seeking to buy aluminum planks will appreciate the benefits of improved durability and lower replacement costs in choosing aluminum over wood.
OSHA Requirements for Scaffold Load Capacity
OSHA regulations mandate that scaffold platforms support at least four times the intended load.
The plank system must be able to safely hold 2,000 lbs when workers and equipment weigh 500 lbs.
Using certified aluminium scaffold planks and the rightstair scaffolding systemfor safe access helps make sure that you follow the rules and lower your chance of getting used.
How to Choose the Right Aluminum Plank for Your Project
Think about these things before you buy:
Maximum load planned
How many people are working on the platform
Things or tools that will be put on the platform
The distance between the supports is called the span.
Required duty rating
When working on roofs or building sites at high heights, aluminium planks andladder brackets for planksmake it safe to move between access points.
When searching for aluminium planks for sale, it is important that you carefully consider the weight capacity certification, support, and compatibility with your scaffold system.
Where to Buy High-Quality Aluminum Planks for Sale
When purchasing aluminium planks, it is important that you look for the following:
Heavy-duty design that has been engineered
Underneath truss design with additional support
Non-slip surface when walking on it
Weight capacity certification
Non-rusting aluminium alloy
At AAIT Scaffold, our aluminium scaffold planks are designed to be compatible with an industrial setting and go beyond the safety requirements necessary for a commercial site.
Frequently Asked Questions
1. How much weight can an aluminum scaffold plank hold?
Depending on size and span, most heavy-duty aluminum planks support 75 psf or more.
2. Are aluminum planks stronger than wood planks?
Yes. Aluminum planks provide greater durability, consistent load performance, and longer lifespan.
3. Do aluminum scaffold planks rust?
No. Aluminum is naturally corrosion-resistant.
4. What size aluminum plank should I buy?
It depends on span length, load requirements, and project type.
5. Are aluminum planks OSHA compliant?
When properly rated and installed, aluminum scaffold planks meet OSHA load standards.
Posted by iDigitalise on | Comments Off on How to Measure and Cut Stringers for Stairs: A Step-by-Step Guide
The stair stringers must be carefully measured and cut in order for stairs to be safe, comfortable, as well as code satisfactory. Even the slightest margin of error in building stairs could mean that steps become uneven or hazardous. This article will walk you through how to accurately measure and cut your stair stringers.
What Are Stair Stringers?
It is the supports on a staircase which are set diagonally. The stair stringers serve the purpose of holding the stair components together by transferring the entire load of the stairs to the floor/landing below.
Stringers are typically manufactured using:
Pressure-treated wood
Solid lumber
Engineered timber (for heavy-duty applications)
Correctly sized and cut stringers ensure:
Even step height
Proper weight distribution
Long-term durability
Understanding Stair Measurements: Rise and Run
Before you begin cutting, you must know these two measurements:
Rise
The vertical height from one step to the next.
Run
The horizontal depth of each step.
How to Calculate:
Record the overall height of the building floor to floor.
Divide that height by the desired riser height (usually 7–7.75 inches).
The result gives you the number of steps.
Divide the total horizontal distance by the number of steps to get tread depth.
Tip: Always make it a point to check the prevailing building regulations before locking your measurements.
Tools and Materials Needed
With proper tools, work is both precise and safe:
Framing square
Stair gauges
Tape measure
Pencil or marker
Circular saw
Handsaw (for finishing cuts)
Level
Safety gloves and goggles
Step-by-Step: How to Measure Stair Stringers
Step 1: Measure Total Stair Height
Measure from the finished lower floor to the finished upper floor.
Step 2: Determine Number of Steps
Total height is divided by standard riser height.
Step 3: Mark Rise and Run on Framing Square
Place the stair gauges on your framing square based upon the calculated values for rise and run.
Step 4: Lay Out the Stringer
Line up the square on the top edge of the board and mark the first step.
Step-by-Step: How to Cut Stair Stringers
Step 1: Double-Check Measurements
Before cutting, verify all markings.
Step 2: Cut Along the Marked Lines
Use the circular saw to make most of the cut, stopping before turning the corner.
Step 3: Finish Corners with a Handsaw
This prevents overcutting and weakens the stringer.
Step 4: Test Fit
Position the stringer and verify that:
Even step height
Level treads
Landing with secure contact
How to Install Stair Stringers Correctly
At the top of the stringer to the header/landing
Attach the bottom portion to the floor
Space stringers evenly (usually 16 inches apart)
Ensuring that all stringers are of equal strength before they undergo final installation
OSHA reports show that more than 24,882 stair-related injuries occur every year in the construction industry alone, many due to inconsistent riser heights or unstable stair bases.
Common Mistakes to Avoid
Cutting without checking local regulations
Cutting corners too much
Using warped or poor quality lumber
Uneven riser heights
Omitting test fit prior to installation
To avoid these errors means staying safe and sound. According toOSHA’s 2019data, slips, trips, and falls contributed to 1030 deaths of all workplace fatalities in construction. Faulty or uneven stairs are one of the main culprits.
Building Code and Safety Requirements
In most regions (including the U.S.):
Maximum riser height: 7.75 inches
Minimum tread depth: 10 inches
Uniform riser height across all steps
Note: The standards to use in a country vary. Before building, refer to local building codes.
Frequently Asked Questions
How many stringers are needed for stairs?
Typically, one stringer every 16 inches of stair width.
Can stair stringers be reused?
Only if they are undamaged, level, and meet current code requirements.
What wood is best for stair stringers?
Pressure-treated lumber or top-quality structural lumber is recommended.
Final Thoughts
Measuring and cutting stair stringers is one important thing that can make a stairway robust as well as safe for use. Measuring, using proper tools, as well as certain factors related to building codes, can enable you to create a stairway as a professional carpenter does. If you are seeking quality parts or construction materials for construction related to scaffolding, AAIT Scaffold can offer you the very best options available.
Posted by iDigitalise on | Comments Off on How Does a Base Collar Work in Ringlock Scaffolding Systems?
Ringlock scaffolding is widely used on sites where speed, strength, and safety all matter. It looks simple once it’s up, but every small part has a job. One of those parts is the base collar, and honestly, it does more work than people notice.
In Ringlock Scaffolding Systems, the base collar sits right at the bottom. It’s one of the first pieces installed, and it sets the tone for everything above it. If this part is ignored or installed wrong, problems show up later. So yes, base collar scaffolding is not optional thinking. It’s basic, but critical.
What Is a Base Collar in Ringlock Scaffolding?
A base collar in ringlock scaffolding is a short vertical tube that connects the scaffold standard to the base jack. It might look small, but it acts as the starting point for the whole structure. Without it, the vertical standards have no proper seat.
In base collar scaffolding, this component works like a connector and a guide at the same time. It helps position the first level of the scaffold correctly. In Ringlock Scaffolding, that first level decides how straight and stable the rest will be.
How a Base Collar Works in a Ringlock Scaffolding System
How a Base Collar Fits Over the Adjustable Base Jack
The base collar slides directly over the adjustable base jack. The jack handles height adjustment, while the collar locks the system into position. This pairing keeps the load centered and controlled.
In base collar scaffolding, this connection reduces movement at ground level. The collar keeps the vertical tube from slipping sideways. That matters more than it sounds, especially on busy sites.
How Vertical Standards Lock Into the Base Collar
Once the base collar is placed, the vertical standard fits directly into it. The fit is tight and intentional. No guessing involved.
Ringlock Scaffolding Systems rely on precise connections. The base collar ensures the standard stays upright and aligned. Without this, the lower section could shift under weight, which is never good.
How the Base Collar Transfers Load to the Ground
Load transfer is where the base collar really earns its place. Weight travels down the standards, through the base collar, and into the base jack. Then it moves into the ground.
This even transfer, in base collar scaffolding, aids in avoiding the sinking and unequal pressure. It reduces stress on individual parts, too. Everything shares the load, and that is how Ringlock Scaffolding maintains stability.
Key Functions of a Base Collar in Ringlock Scaffolding
Creating a Secure Starting Point for Ringlock Standards
Every scaffold deserves a solid start. It’s the base collar that does that. It locks the standard into place and eliminates guesswork.
In Ringlock Scaffolding, starting clean and straight saves time later. Base collar scaffolding helps build confidently, not making adjustments every few steps.
Maintaining Vertical Alignment of Ringlock Scaffolding
Vertical alignment affects safety and load capacity. A small lean at the bottom turns into a big problem at height.
Base collar scaffolding helps keep standards straight from the start. The collar acts like a guide, holding the tube steady while other parts are added.
Ensuring Even Load Distribution in Ringlock Systems
Even load distribution protects both workers and materials. The base collar spreads weight evenly across the base.
In Ringlock Scaffolding Systems, this balance reduces stress points. It also extends the life of the scaffold parts, which crews appreciate over time.
Benefits of Using a Base Collar in Ringlock Scaffolding Systems
Improved Scaffold Stability and Worker Safety
Stability is the biggest benefit. A properly installed base collar reduces movement at ground level.
Base collar scaffolding helps workers feel safer. When the base feels solid, confidence goes up. That leads to better focus and fewer mistakes.
Faster Assembly Compared to Traditional Scaffolding Systems
Ringlock Scaffolding is already known for speed. The base collar supports that by making alignment easier.
Crews don’t need to adjust as much. Parts fit where they should. Base collar scaffolding keeps the setup smooth and predictable.
High Compatibility With Ringlock Standards and Ledgers
The base collar is designed to work only with ringlock parts. That compatibility matters.
In Ringlock Scaffolding Systems, each piece supports the other. The base collar fits standards cleanly and supports ledgers without extra tools or adapters.
Installation Process of a Ringlock Scaffolding Base Collar
Ground Preparation Before Installing a Base Collar
Ground prep comes first. The surface must be firm and level. Loose soil or soft ground causes trouble later.
Base collar scaffolding works best when the base jack sits on a stable surface. Sometimes that means using sole boards or plates.
Placing the Base Collar on Adjustable Base Jacks
After the base jack is set, the base collar slides on top. It should sit flat and centered.
In Ringlock Scaffolding, rushing this step leads to alignment issues. Taking a moment here saves time later.
Installing the First Ringlock Vertical Standard Correctly
The vertical standard goes directly into the base collar. It should drop in smoothly without force.
Base collar scaffolding relies on proper fit. If it feels wrong, it probably is. Adjust before moving on.
Common Installation Mistakes With Ringlock Base Collars
Installing Base Collars on Uneven or Weak Ground
Uneven ground causes uneven load. That’s a common mistake.
In base collar scaffolding, ground issues show up fast. Standards tilt. Adjustments increase. Safety drops.
Incorrect Engagement Between Base Collar and Standard
If the standard is not seated properly, the connection weakens. This mistake often goes unnoticed.
Ringlock Scaffolding depends on tight fits. The base collar must fully support the standard, no gaps.
Inspection and Maintenance of Ringlock Base Collars
Daily Visual Inspection Before Scaffolding Use
Quick checks matter. Look for bends, cracks, or heavy rust.
Base collar scaffolding parts are strong, but damage happens. Spotting it early prevents bigger issues.
Checking Base Collars for Cracks, Deformation, or Rust
Rust weakens steel over time. Deformation affects alignment.
In Ringlock Scaffolding Systems, damaged base collars should be removed from use. No shortcuts here.
Applications of Base Collars in Ringlock Scaffolding Systems
Base Collars for Residential and Commercial Construction
Base collars are used in homes, offices, and high-rise buildings. The need is the same everywhere.
Base collar scaffolding supports safe access for workers at all heights.
Base Collars for Industrial Maintenance and Heavy-Duty Projects
Industrial sites require strength and dependability. The base collar supports weighty cargoes without problems.
Ringlock Scaffolding is common in plants and refineries, and the base collar plays a key role.
Ringlock Base Collar vs Other Scaffolding Starter Components
Ringlock Base Collar vs Cuplock Starter
Cuplock systems use a different starter method. Ringlock base collars offer quicker alignment.
Ringlock Scaffolding seems to be more flexible while assembling, particularly when the ground is not level.
Ringlock Base Collar vs Frame Scaffolding Base
The base collars of the frame scaffolding are bulkier. Base collars of Ringlock are more compact and easy to handle.
Base collar scaffolding also allows better height adjustment at the base.
Frequently Asked Questions About Ringlock Base Collars
What is the purpose of a base collar in ringlock scaffolding?
It connects the vertical standard to the base jack and creates a stable starting point.
Is a base collar mandatory in ringlock scaffolding systems?
Yes. Base collars are meant to be utilized for better support by the Ringlock Scaffolding Systems.
How does a base collar improve ringlock scaffolding stability?
It keeps standards aligned and helps distribute weight evenly.
Can ringlock base collars be reused on multiple projects?
Yes, they are, provided they are in good condition and properly inspected.
What materials are ringlock base collars made from?
They are usually made from high-strength steel.
Does the base collar affect the load capacity of ringlock scaffolding?
Indirectly, yes. Proper load transfer improves overall performance.
Can base collars be used with adjustable base jacks?
Yes. They are designed to work together.
Conclusion
The base collar may be small, but its role is big. It supports alignment, load transfer, and safety from the ground up. The Advantages of Ringlock Scaffolding Systemhighlights its high load capacity, strong stability, and quick assembly. Its modular design makes it suitable for diverse construction and industrial projects.
In Ringlock Scaffolding, every part depends on the start being right. Base collar scaffolding ensures that start is strong, stable, and reliable every single time.
Posted by iDigitalise on | Comments Off on How to Properly Maintain and Inspect System Scaffolding Components
System scaffolding components looks solid once it’s up, but honestly, the strength of it shows more in how well it’s checked and maintained. A lot of sites treat it as “set and forget,” and that’s where small risks creep in. With the right care, system scaffolding stays safe, stable, and usable for a long time. So let’s walk through how this works in real life, not in textbook language, just practical steps that make sense.
What Is System Scaffolding?
Definition and Key Characteristics of System Scaffolding
People often ask what is system scaffolding when they see the modular frames and clean locking points. In simple terms, it’s a type of scaffold made using pre designed parts that lock together in fixed patterns. The characteristics of system scaffolding include fixed connection points, uniform spacing, and a setup that feels more like assembling a structure than building one piece by piece. This makes the structure more repeatable and predictable. You don’t have to guess much once you know the system.
Difference Between Modular System Scaffolding and Traditional Tube-and-Coupler Scaffolding
Modular system scaffolding components uses ready made frames, standards, and ledgers that connect through built in joints. Traditional tube and coupler systems rely on loose tubes and clamps that require more time and measuring. Both work, but system scaffolding feels faster to build and easier to check. With older methods, one missed clamp can become a risk. Because the modular parts have controlled joint components in place, staff can identify errors earlier in the assembly process.
Why Maintenance and Inspection of System Scaffolding Matters
Ensuring Safety and Structural Stability
Safety is the primary reason for examining system scaffolds; a loose joint or an incorrectly positioned ledger may not appear to be a major issue, however, they significantly affect how the load is distributed. Over time, those small issues turn into real danger. Regular checks help the structure behave the way it was designed to behave. Regular maintenance also goes hand in hand with accountability—understanding who is responsible for inspecting the scaffold and its components helps ensure inspections are done correctly and on schedule.
Compliance with Safety Standards and Regulations
Inspections also keep the site aligned with safety rules. Many regulations expect routine checks, written records, and proper repair work. When inspections are done regularly, external audits feel less stressful. It also gives workers more confidence climbing and working on the frames.
Key Components of System Scaffolding to Inspect and Maintain
Vertical Standards and Horizontal Ledgers
Standards carry the full vertical load. Ledgers connect these standards horizontally. If either of these bends or cracks, the frame loses strength. Checking them for rust, dents, or unusual wear is a basic but important step.
Braces, Diagonal Bracing and Connectors
Braces are what stop the structure from moving sideways. Connectors hold everything in place. In system scaffolding components, these parts come under stress every day, so a quick visual check helps find early signs of damage.
Base Plates, Anchors, and Foundation Supports
The base holds the weight of the whole structure. When the base plate shifts or ground settles, the section above it will not be stable; therefore, inspectors need to examine all anchor points and foundation areas to find other concealed dangers.
Decking, Platforms, and Guardrails
Decks and platforms take direct load from people and tools. Guardrails protect workers. Both should be checked for cracks, bends, and smooth locking. A weak platform increases the chance of accidents, so it deserves extra attention.
Regular Inspection and Maintenance Checklist for System Scaffolding
Visual Inspection: Cracks, Corrosion, Bends, Wear and Tear
A visual scan takes only a few minutes. Look for cracks, rust patches, bent sections, and worn edges. These issues often show up before complete failure. Catching them early saves time and prevents serious incidents.
Check Connections, Locks, and Couplers
Connections need to fit tightly. Locks should sit flat and couplers should not wiggle. Even high quality system scaffolding depends on tight joints. A loose point changes how forces move through the frame.
Verify Proper Assembly, Leveling, and Alignment
Alignment is about keeping the structure straight. The moment things tilt, weight shifts unevenly. A quick level check solves many problems before they become serious.
Ensure Adequate Bracing and Anchor Points
Braces and anchors add rigidity. Without enough of them, the scaffold feels soft under load. These should be checked carefully every time the structure changes.
Inspect Platforms, Decking and Guardrails for Safety
Boards that look worn or slippery should be replaced. Guardrails should not feel loose. These checks focus directly on worker safety, which makes them critical.
When to Inspect System Scaffolding Components
Before First Use and After Assembly
Every new setup should be fully inspected before anyone climbs. That first check sets the baseline for later inspections too.
After Any Modification, Repair or Movement
Whenever the structure changes, small issues can appear. System scaffolding that gets modified must be inspected again, even if the change looks small.
Regular Periodic Checks
Daily checks help catch fresh issues. Conducting more comprehensive inspections on a weekly basis gives staff insight into the gradual deterioration of the product. Most sites create their own routine based on risk level.
After Severe Weather or Heavy Load Use
Wind, rain, or heavy loading can cause hidden strain. Inspection after these events is a simple step that prevents future failures.
Common Problems and What to Do If You Find Them
Damaged or Bent Components
Bent parts should not be forced back into shape. They need repair or replacement. Using damaged parts puts the whole system at risk.
Loose or Missing Connectors or Braces
Loose parts should be tightened right away. Missing parts should be replaced before work continues.
Unstable Foundation
If the base feels soft or uneven, it needs re leveling. Extra support should be added under weak ground.
Worn or Unsafe Decking
Decks that show wear should be removed immediately. It is better to delay work briefly than risk a fall.
Best Practices for Long Term Maintenance and Safety
Use Manufacturer Recommended Parts
Using the correct replacement parts enables the system scaffolds to continue functioning as they were originally designed, whereas the use of different manufacturer’s scaffolding componentscould create challenges in the fit of the components to one another.
Maintain a Log or Inspection Register
Documentation of recurring issues not only assists in tracking them but also shows enhanced efforts toward safety to inspectors visiting the site.
Train Personnel on Inspection and Safe Use
Training helps workers spot problems early. Once they know what to look for, inspections become faster and more effective.
Conclusion: Keeping Your System Scaffolding Safe and Reliable
System scaffolding performs well when people respect the inspection process. Regular checks, small repairs, and clear routines make the structure safer and more reliable over time. When system scaffolding is treated as a living part of the job site instead of a static tool, the risk drops and productivity improves. It’s a simple mindset shift, but it makes a real difference.
Posted by iDigitalise on | Comments Off on Essential Features of Tubular Scaffolding Systems Every Contractor Should Know
Understanding the Basics of a Tubular Scaffolding System
Scaffolding isn’t the flashiest part of a construction site, but you know what? it’s what keeps everything moving safely. Among the different types used today, tubular scaffolding systems are probably the most common. Steel tubes and fittings make up a temporary scaffolding framework for workers and materials. Nothing fancy, just strong, simple, and dependable.
A tubular scaffolding system is a series of vertical and horizontal tubes joined by couplers. It’s built to handle heavy loads while keeping balance and stability in place. Contractors like it because it’s easy to adjust; you can change height, angles, or shape depending on what the building needs. So, no wonder it’s still the go-to system across all kinds of projects.\
Key Features of Tubular Scaffolding Systems
Versatility and Adaptability
When people talk about tubular scaffolding, one of its best-known attributes is flexibility. You can set it up for a small repair job or a tall tower build, as it adjusts to almost anything. The tubes can be joined in hundreds of ways, making it perfect for complex designs too. It’s that kind of system you can rely on when the plan keeps changing on site.
Strength and Durability
These systems are sturdy because they use strong steel tubes that can support considerable weight, and once the couplers lock the tubing in place, everything feels secure. This is true even for scaffolding left up beyond a year of continuous use or refreshed and/or after being rocked by wind and rain. That’s why many contractors keep reusing the same tubular scaffolding setup year after year.
Ease of Assembly and Disassembly
Honestly, this is one of the biggest reasons contractors stick with tubular scaffolding. It doesn’t take forever to assemble. The tubes and couplers fit quickly, and if you’ve got an experienced crew, setup time is short. When the job’s done, dismantling is just as fast. That’s a big plus when every hour counts on site.
Cost-Effectiveness
Let’s face it, construction costs never stop climbing. But tubular scaffolding systems are still pretty cost-efficient. Since they’re reusable, you don’t have to keep buying new material for every project. Maintenance is simple too; all you have to do is just clean, check, and store properly. Over time, the savings add up to more than you’d expect.
Safety Features
Safety is everything on a scaffold, and this system gives plenty of that. When assembled right, the structure stays steady. Guardrails, braces, and platforms help prevent slips and falls. The topside is more secure when it is not swaying and more difficult to drop a tool from if it is still. So yeah, a well-built tubular setup really reduces risks on site.
Compatibility with Other Systems
Sometimes, you need to mix scaffolding types to match the site design. That’s another reason tubular scaffolding is popular: it connects easily with other systems. For example, you can extend it or fit it around tricky building edges. That’s what makes scaffolding system customization so convenient with tubular models.
Components of a Tubular Scaffolding System
Tubes (Verticals and Horizontals)
The tubes are like the bones of the whole structure. Verticals carry the load, while horizontals hold everything together. Simple but crucial. Without good-quality steel tubes, you can’t expect real strength.
Couplers and Connectors
Couplers do the real connecting work. They join tubes at angles, ends, or joints. You’ve got several types like right-angle, swivel, or sleeve couplers, each one used for different purposes. A solid connection means everything stays stable.
On the bottom, base plates and jacks stabilize the scaffold on an uneven surface and keep a level loading load. Without them the scaffold could soon become wobbly regardless of safety.
Bracing, Guardrails and Toeboards
Braces give more stability and prevent swaying, and guardrails and toeboards keep workers safe and tools from falling. Small parts, sure, but they keep the big picture safe.
Platforms/Planks and Decking
This is where workers actually stand and move. The planks need to be firm and well fixed. You don’t want loose boards or weak spots, as they can turn dangerous in seconds.
Best Practices for Using Tubular Scaffolding Systems
Proper Planning and Design
Before a scaffold is erected, planning is invaluable. The design should be appropriate for the building’s rising structural shape and height. This may sound basic, but thoughtlessly planning leads to preferences or safety hazards ahead of time.
Using Qualified Personnel
A trained crew makes all the difference. Setting up tubular scaffolding may seem easy but it can be dangerous even with a small lapse in attention to detail. Generally speaking, assembly and inspection should always be completed by qualified individuals.
Regular Inspections and Load Monitoring
Inspecting scaffolding periodically is necessary and not optional. Over time, joints can loosen, and/or tubes can become worn out. Careful monitoring of the load limits and overall stability is the best way to avoid problems.
Fall Protection, Weather & Electrical Safety
Workers should always wear safety harnesses when needed. Employees should avoid using scaffolds in substantial rain or heavy winds, and scaffolding should not be used on the project if it is within proximity of electrical lines. It is always better to err on the side of caution. A small mistake can lead to a catastrophic accident.
Housekeeping and Compliance with Standards
A tidy scaffold area is a safer area. Tools, wires, or materials lying around can easily cause accidents. Also, follow national safety guidelines, as it’s not just a rule; it’s protection for your team.
The Role of Couplers in Tubular Scaffolding Systems
Right-Angle Couplers
These are used to connect vertical and horizontal tubes, keeping the structure firm at 90 degrees.
Swivel Couplers
They are used when you need the tubes to join at a different angle. Tubular couplers are one of the best choices for diagonal bracing or where a modification is needed when going around a corner.
Sleeve Couplers
These extend the scaffold by joining tubes end-to-end. Tubular Couplers are a good option where you require a small addition of height or need to reach a distance.
Board Retaining & Base-plate Couplers
Plank retaining couplers are designed to keep the planks secure on the Scaffold and the baseplate coupler keeps the base of the entire Scaffold tight. Individual tubular couplers may seem small, but they play a part in keeping the entire structure secure.
Conclusion
Why are tubular scaffolding systems so popular? A combination of strength, adaptability, and long-lasting reliability. Contractors prefer this scaffolding material because it is easy to use and performs reliably under real site pressure. The Benefits of Tubular Scaffolding include more than just durability; it is also safer, more affordable and easier to adjust for difficult structures. In short, if your project needs an overall tough and adaptable scaffold system, this option is rarely not up to the expectation.
FAQ
What are the main advantages of using a tubular scaffolding system?
The main Tubular Scaffold benefits are based on strength, flexibility and reusability. It is safe for both large and small applications and works well in constantly shifting conditions.
What types of couplers are used in a tubular scaffolding system?
There are different varieties, such as the right-angle, swivel, sleeve, or board-retaining couplers and each coupler connects parts differently depending on the needs of the structure.
How often should a tubular scaffolding system be inspected?
Ideally before every major shift or weather change. Routine checks ensure problems will be identified prior to use and are another way to assure the scaffolding is safe to use.
What is the maximum height for a tubular scaffold?
It will depend on the design, loads and regulatory limits. There is technically no single limit, but anything must always be designed and verified by a competent engineer.
What are the key safety considerations when working with a tubular scaffolding system?
Include safety gear, follow load limits, never skip an inspection, keep scaffolding clean and stable and comply with local standards and that will prevent accidents.
Posted by iDigitalise on | Comments Off on Top 5 Ways Modular Scaffolding Systems Save Time on Construction Sites
A modular scaffolding technology is transforming the way people build things today. Globally, contractors are moving away from heavy, slow scaffolding and toward smarter, faster, flexible options. These are usually modular systems that make building quicker, safer, and cheaper. They limit the number of hours workers have to work through job efficiency, improve safety, and allow teams to complete complicated work with less manpower on the job. This blog will elaborate on what modular scaffolding systems are, how they work, and the top 5 ways modular scaffolding systems can save time on the job site.
Understanding Modular Scaffold and Its Growing Demand
What Are Modular Scaffolding Systems?
A modular scaffolding system is a construction system made up of pre-constructed parts that can be assembled and configured in multiple ways. Modular scaffolding is not a system with loose tubes and clamps as in traditional-type scaffolding, but a system with a series of interlocking connection points that become tight. This allows teams to quickly create structures and assemble materials accurately.
These scaffolds are made out of steel or aluminum, lightweight but strong. Since scaffolding systems can bend or hold, they can lend themselves to many different projects, from a simple repair to large commercial buildings. Their demand has grown dramatically over the past ten years as construction companies see how much time and work they can save with this technology.
Key Advantages of Using Systems Scaffolding
There are many evident benefits of using systems scaffolding. It cuts down on the time it takes to put up and take down, which makes it great for projects that move quickly. The uniform parts make the structure more stable and safe, which lets workers move around safely at height. These tools also let teams make precise changes to height and layout, so they can quickly respond to design changes on-site.
Contractors like them better since they need less tools and the parts can be swapped out. You can utilize the same scaffolding on more than one project, which saves money and space.
Different Scaffold Types Used in Construction
Traditional vs. Modular Scaffold Systems
When using traditional scaffolding, you typically have to put together loose pipes, clamps, and planks one at a time. It is reliable, but it takes a long time and expert workers to make sure everything is lined up correctly. On the other hand, modular scaffolds come with connecting points that are already there. This cuts down on the time it takes to put things together and gets rid of guesswork.
Also, traditional configurations are heavier and less flexible. Modular scaffolding systems can quickly be changed to go around angles, circular surfaces, and different heights, making them ideal for strange designs or hard-to-access areas in buildings. Many modern construction sites prefer this system for its quickness and convenience.
Choosing the Right Scaffold Type for Your Project
Every job requires a different kind of scaffolding. Simple frame scaffolding is still effective for small residential jobs because it is relatively inexpensive and light enough to move. However, modular scaffolds are valuable for larger commercial or industrial scaffolding jobs.
When selecting the right kind, you also need to factor in considerations such as possible heights, the weight load if applicable, and the conditions of the site, such as soil. Modular systems scaffolding works best if you need something that is flexible and can be set up quickly. It’s important to choose the right size and type of scaffolding for the job.
Essential System Scaffolding Parts You Should Know
Main Components of a Modular Scaffold
It’s helpful to know the main aspects of a system scaffold to understand how these systems work. These are standards (vertical tubes), ledgers (horizontal supports), transoms, base plates, and diagonal braces. Each part fits together perfectly, making a strong structure without the need for further fittings.
Workers can stand safely on platforms or decks that sit atop the ledgers. To enhance safety and improve access, they constructed guard rails gate, toe boards and ladders. The most advantageous aspect of modular scaffolding is that every component intertwines in a way that is logical, allowing teams to complete large projects more quickly.
How Quality Scaffolding Parts Improve Efficiency
Utilizing quality system scaffolding components improves overall job performance. Strong, durable components do not flex or sway, immobilizing the structure during loading, while durable locking arrangements and bracing lessen the likelihood of accidents.
Equipment is lessened both ways. The tools fit together effortlessly, allowing for more efficient setupand takedown. Individuals tend to be less distracted and function more efficiently utilizing brand-new fittings. Over time, this durability and performance translates into time savings and reduced disruptions.
Top 5 Ways Modular Scaffolding Systems Save Time
1. Faster Assembly and Dismantling
Perhaps the most appreciated feature of modular scaffolding is the ease of assembling the system. Because the components are pre-engineered with jointing features, the systems assemble far more easily than when using traditional methods. Even less experienced staff members navigate the process with basic supervision.
Taking it apart is equally as quick. It’s easy to take apart each portion, which speeds up site changes. This efficiency makes a big impact for projects with short deadlines.
2. Reduced Labor and Equipment Needs
Modular scaffolding needs fewer workers. Fewer personnel are needed to install the parts because they are lighter and easier to connect. Less usage of heavy instruments also makes people less tired and makes work go more smoothly.
This method saves time and lets teams do more in a day. It also lets contractors move workers to other important parts of the construction process. In the end, the job will take less time without sacrificing safety or quality.
3. Enhanced On-Site Safety and Productivity
Safety and productivity are two sides of the same coin. Modular scaffolding systems have several safety features, including safety rails, non-skid working platforms, and secure locking joints. When workers feel secure about the support structure they work on, they feel safe.
When they feel assured, they can focus their attention on what they are doing, rather than thinking about loose connections or if they can maintain their balance. Fewer accidents also mean less downtime. When safety gets better, productivity automatically goes up.
4. Easy Customization for Complex Projects
Construction sites are never the same from one project to another. Each building has its own unique shape and problem. Modular scaffolding systems are flexible, to where you can add or remove parts and not worry about resetting the entire system again.
This flexibility is beneficial for construction projects that have continuous rough surfaces or multiple levels due to the fact that access to all areas is made without the continual need to adjust. The end result is steady growth with no time wasted.
5. Reusable Design and Efficient Material Handling
Modular scaffolds are made to last, unlike materials that are only used once. You can use them again and again on different tasks without them losing strength or dependability. This means less time spent getting new materials and less mess at work sites.
System scaffolding elements that are all the same size also make it easier to move and store them. Contractors can better organize, load, and move them, which makes logistics better overall. A design that can be used again makes sure that everything goes smoothly and stays the same.
Why Contractors Prefer Modular Scaffold Over Conventional Types
Time-Saving Benefits of Systems Scaffolding
Speed is still the key reason why contractors like modular scaffolds. The goal of each portion of the system is to make work easier. Workers may simply move up and down because the modular layout doesn’t require them to keep moving ladders or boards.
These strategies assist in keeping things moving forward even when the schedule is unclear. Because there is little downtime between construction stages, crews can make their scheduled timeline without issues. Contractors like how modular installations give them multiple options for building work.
Long-Term Cost Efficiency and Durability
There may be an initial higher cost for modular scaffolding, but in a short timeframe, it pays for itself on a project. Each section is a built system that will not rust, wear out, or fall destructively due to accidental use. The maintenance costs are even less because of fewer parts being compromised and requiring replacement.
Contractors can save money on buying or renting equipment for future projects when they use reusable solutions. The long-term worth is unmatched when you add in the time saved.
Where to Find Reliable System Scaffold for Sale
Factors to Consider Before Buying
Before buying a system scaffold for sale, contractors should carefully think about what their project needs. Material type, height capacity, ease of assembly, and safety certifications are some of the most important things to think about.
When you buy from a trusted company, you can be guaranteed that the product satisfies quality standards. Check welds, connecting points, and surface coatings all the time. These things will affect how long your scaffolding lasts and how safe it is to use.
Trusted Suppliers of Modular Scaffolding Systems
There are currently a number of trustworthy vendors who sell high-quality modular scaffolding systems for a variety of projects. The better ones give you thorough information about the product and warranty choices and help after you buy it.
If you work with a reliable provider, you can be sure that replacement parts will be easy to find. This minimizes downtime in the event that something breaks or needs to be altered during the process.
Final Thoughts on Using Modular Scaffolding Systems
Building Faster, Safer, and Smarter with Systems Scaffolding
The rail scaffolding system represents a tremendous advancement towards an efficient construction process. It is a strong, flexible, and exceptionally fast system that allows builders to save significant amounts of time without taking shortcuts. Tasks that may have taken weeks to complete can now be accomplished in a few days.
Investing in modular scaffolding is both a smart move for contractors looking to stay competitive. If you are looking to eliminate construction delays, helpreduce labor costs, and improve safety, then modular scaffolding systems are the future of construction.
Frequently Asked Questions (FAQs)
1. How is modular scaffolding different from traditional scaffolding?
Modular scaffolding also features connecting pre-fixed anchor points for faster erecting and dismantling times. Normal scaffolding relies on loose pipes and clamps and by doing so, necessitates installing more parts, which takes considerable putting together.
2. Can modular scaffolding be reused for multiple projects?
Yes, it was meant to be reused. If maintained, they can utilize strength and stability over the course of multiple construction cycles.
3. Are modular scaffolding systems safe for large projects?
Yes, of course. Systems scaffolding has safety features like guardrails, secure locks, and stable platforms, so it can be used for both small and large construction projects.
4. What are the main system scaffolding parts used?
The primary components are standards, ledgers, transoms, foundation plates, and braces. The assembly of these materials is straightforward, yielding a solid and stable frame.
5. Why do contractors prefer modular scaffold systems?
General contractors like the flexibility for sure. For multiple applications, installation, and long-term cost savings. Time, limited occupancy, and overall site safety can also be improved with multiple applications.


 Download